Staining a hardwood deck takes time and careful planning to make sure the results last. Each step helps develop a solid foundation before finishing. Pre-coating surfaces must be dust-free. Stain absorbs evenly with proper preparation, preventing blotches. Here, learn more to prevent delays by having tools on hand. You can improve your strategy by learning established preparation practices that protect and enhance wood. With careful care, the surface will last and look good.
Surface Cleanup
- Get rid of dirt and debris that is loose with a vigorous brush.
- Rinse the panels carefully to get rid of dirt.
- To protect sensitive hardwood surface fibers, avoid strong streams.
- Allow thorough drying before proceeding with preparation for better outcomes.
- If residue remains after washing, lightly clean again.
Fix Damages
- Cracks or breaks in boards could weaken the framework.
- Replace old planks for a stable platform.
- Tighten loose nails and screws to avoid movement while working.
- Fill minor gaps with wood filler for an equal finish.
- Sand repaired areas to match surrounding boards.
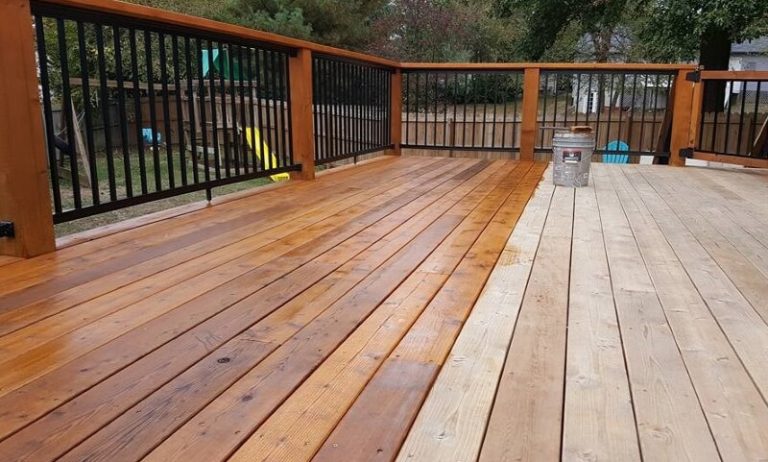
Sanding Method
- Smooth rough boards fast using a power sander.
- Avoid uneven marks by following the grain.
- First, brush the surface with medium-grit paper.
- Use fine grit for a smooth finish.
- To prepare for the following stage and gain better suggestions, vacuum dust.
Selecting Stains
- Use a good stain for the climate.
- Color should fit surroundings without overwhelming the structure.
- Choose oil- or water-based products.
- Check product labels for wood compatibility.
- Before coating the whole surface, test a tiny, hidden sector first.
Steps to Stay Safe
- Use gloves to retain skin harmless from chemicals and broken pieces.
- Put on glasses to keep dust out of your eyes while you clean and sand.
- When you use tools, keep youngsters and pets away from you.
- Keep everything dry and away from fire.
- To use items safely, follow label instructions.
Common Questions
- Let the wood set for 24 hours before staining.
- Inappropriate for an even finish.
- Mild, dry weather without bright sunlight is best.
- Only apply two coats if the manufacturer recommends it for coverage.
A strong and appealing surface finish starts with thorough preparation. Cleaning, repairs, sanding, and product selection produce long-lasting color and strength. Every phase makes sure that the dye consistently soakings into the wood, which stops it from fading or shedding too soon. You can learn more about the procedure to get the best outcomes. Taking safety measures makes the job easier. By following a full approach, you protect the structure and keep it attractive for years.